

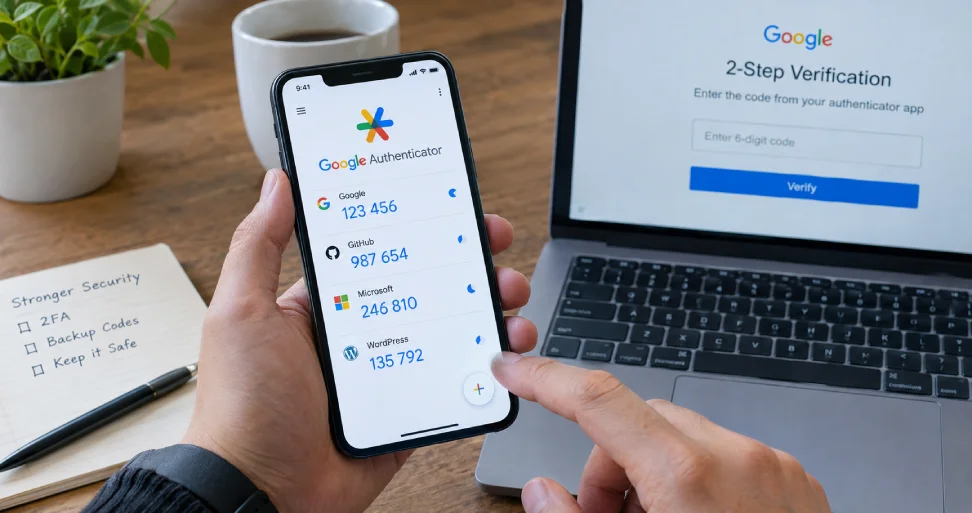
To use Google Authenticator, install the app on your phone, turn on two-step verification for the account you want to protect, add that account to the app by scanning a QR code or entering a setup key, and then type the six-digit code from the app each time you sign in. The code changes every short interval, and it works without internet.
In this guide I explain how to use the Google Authenticator app in plain steps: how to set it up, how to add other websites, how to sync or transfer codes to a new phone, what to do on a PC, and how to avoid being locked out. Because this is a security tool, I will also be direct about the risks, not just the clicks.
The steps follow Google’s own Authenticator help page. Menu names can change between app versions, so treat the wording below as a guide and match it to what you see on your screen.
What is Google Authenticator and how does it work?
Google Authenticator is an app that generates one-time codes for two-step verification, often called 2FA. After you enter your password, the website asks for a second proof: the current code from your app. That means a stolen password alone is not enough to sign in.
Behind the scenes, when you add an account the website and the app share a secret key. The app combines that secret with the current time to produce a short-lived code, and the website does the same calculation to check it.
Technically this is a time-based one-time password (TOTP), defined in RFC 6238. The practical point: the app does not need a signal or internet connection, but your phone’s clock must be correct, because the code depends on time.
Google lists authenticator apps as one of several second steps. In its 2-Step Verification help, Google recommends prompts and describes passkeys and security keys as stronger protection against phishing, while text or voice codes are more exposed to phone-number attacks. So an authenticator app is a solid choice, but not the only one.
Before you start
- Install the official Google Authenticator app from Google Play (Android) or the App Store (iPhone and iPad). Check that the publisher is Google LLC.
- Check your phone’s date, time and time zone. Google notes that the app uses the device’s system time and that newer versions removed the old time-correction setting.
- Decide whether you want codes synced to your Google Account or kept only on this phone. I explain the trade-off below.
- Keep your recovery options ready: a second phone number or email, and backup codes if the service offers them.
How to use Google Authenticator: step-by-step setup
Step 1: Open the app and choose how to store codes
When you first open the app, you can sign in with your Google Account or tap Use without an account. Per Google, signing in syncs your codes to your account so they are available on other devices. Using the app without an account keeps codes only on that device.
Step 2: Turn on two-step verification for your Google Account
- Open your Google Account and go to Security.
- Under how you sign in to Google, select 2-Step Verification and sign in if asked.
- Choose Authenticator app, then follow the on-screen instructions. Some devices show “Set up authenticator” or “Get Started.”
- Confirm with the code shown in the app.
Google notes that the app may take some time to appear as a sign-in option after setup. If it is not there immediately, check again later before repeating the process.
Step 3: Add other accounts, such as social media, banking or WordPress
For any site that supports authenticator apps, the pattern is the same:
- On the website, open Security settings and choose the option to use an authenticator app.
- The site shows a QR code and often a text setup key.
- In Google Authenticator, tap the add button and choose Scan a QR code, or choose Enter a setup key and type the key with an account name.
- Type the six-digit code from the app back into the website to confirm.
- Save the backup or recovery codes the site gives you, in a safe place away from your phone.
Do not take a screenshot of the QR code or leave the setup key in an open note. Anyone who has that key can generate your codes.
Step 4: Sign in with a code
Next time you sign in, enter your password, then open Google Authenticator, find the account name and type the current six-digit code. The code refreshes regularly, so if it is about to expire, wait for the next one rather than guessing. If codes are rejected, the usual cause is a wrong phone clock.
Checkpoint: You can sign in to one test account using only your password and a code from the app.
How to use Google Authenticator on a PC
Google does not offer a separate Google Authenticator app for Windows or Mac, and its help page describes the app for Android and iPhone. That surprises many people, because a lot of search results suggest otherwise. You have three realistic choices:
| Option | How it works | Think about |
|---|---|---|
| Use your phone as normal | Sign in on your PC, then type the code from the app on your phone | The safest and simplest choice. Nothing changes on the computer |
| A third-party desktop or browser authenticator | You enter the same setup key into another TOTP tool, so it generates the same codes | It is not Google Authenticator. Trust, updates and storage vary, so choose carefully |
| A password manager with built-in codes | Store one-time codes in a manager that supports TOTP | Convenient, but putting passwords and codes in one place weakens the “second” factor |
Make Tech Easier’s guide to using Google Authenticator on Windows says there is no official Google app for a Windows PC and lists third-party options. The general method is to choose the manual-entry option when setting up 2FA, copy the setup key into the other tool and confirm with the six-digit code. Anyone who obtains that key can access the account, so keep it private.
My view: if your goal is security, keep codes on your phone. If you must use a PC, pick a tool from a reputable source, protect it with a password, avoid browser extensions you do not recognize and never store the setup key in plain text.
How to transfer Google Authenticator to a new phone
This is where people get locked out, so do it before you wipe or lose the old phone.
Method 1: Sync through your Google Account
If you were signed in to the app with your Google Account, install Google Authenticator on the new phone, tap Get Started and sign in with the same account. Per Google, synced codes transfer automatically.
Google announced account sync for Authenticator in April 2023, as TechCrunch reported, and that coverage also noted that some users may be wary of storing sensitive codes in the cloud. Choose what fits your risk level.
Method 2: Export and import codes
You need the old phone with the latest app, and the new phone.
- Install Google Authenticator on the new phone.
- On the old phone, open the menu and go to Transfer codes, then Export codes. Unlock the phone, select the accounts and tap Next.
- On the new phone, open the menu, go to Transfer codes and then Import codes, and scan the QR code. If you exported many accounts, you may see several QR codes.
- Wait for the confirmation, then sign in to a test account with the new phone before you wipe the old one.
The exported QR code contains your secrets, so do it privately and never photograph or share it.
If the old phone is gone
If your codes were synced, sign in to the app with your Google Account on the new phone. If not, Google says codes are not backed up, so you must visit each website and set up two-step verification again. That is why backup codes and a second recovery method matter.
Sync vs no account: which is safer?
| Synced to Google Account | Use without an account | |
|---|---|---|
| Convenience | Codes appear on your other devices and survive a lost phone | Codes exist only on one device |
| Main risk | If your Google Account is compromised, codes may be exposed too | Lost or broken phone means you must relink every site |
| Good for | Most everyday users who protect their Google Account well | People who want codes strictly local and keep careful backup codes |
Neither choice is right for everyone. If you sync, protect your Google Account with a strong, unique password and a second step that is hard to phish, such as a passkey or security key. If you do not sync, store each site’s backup codes safely.
What to do if you lose your phone or locked yourself out
- Use backup codes. Google provides 8-digit backup codes you can print or download for use if you lose your phone. Store them somewhere safe and private.
- Use another second step. If you added a passkey, security key, prompt or phone number, choose Try another way at sign-in.
- Secure the lost device. Use remote erase on the phone. If your codes were synced, you can also remove the device from your Google Account.
- Re-link each site. If codes were not synced, sign in to each site using its recovery process and add a new authenticator.
Do this planning before you need it. Write down which accounts use the app and where each recovery path is.
Common problems and fixes
| Problem | What to check |
|---|---|
| The code is rejected | Make sure your phone’s time, date and time zone are correct and use the latest displayed code |
| The app does not appear as an option after setup | Wait and try again; Google says it can take time to show up |
| A site will not accept the QR code | Use the manual setup key option and enter it carefully with the right account name |
| Codes missing on the new phone | Sign in with the same Google Account if synced, or use Export and Import from the old phone |
| Locked out of a site | Use that site’s backup codes or recovery process |
| Account deleted by mistake | Google notes deleting a synced code removes it from all synced devices, so relink the site |
Security tips for using Google Authenticator
- Turn on the app’s privacy screen so your device verification is required before codes appear, as Google recommends.
- Add more than one recovery method so one lost phone is not a lockout.
- Never share a code with anyone. Support teams do not need it, and scammers ask for it.
- Beware of fake sign-in pages. A one-time code can still be phished in real time, which is why Google describes passkeys and security keys as stronger options.
- Prefer an authenticator app over text-message codes where you have the choice, but prefer a passkey where it is offered.
If you manage a website, add two-step verification to administrator logins as well. My WordPress guides cover site basics, and if you want help securing a business site, Leelija Web Solutions, the company I lead, provides web development and digital marketing services.
Google Authenticator checklist
- App installed from the official store listing, phone clock correct.
- Decision made: sync with Google Account or keep codes only on this phone.
- Two-step verification on for your Google Account and key accounts.
- Backup codes saved safely for every important account.
- A second sign-in method added.
- Transfer plan tested before changing phones.
- Screenshots of QR codes and setup keys deleted or never taken.
Frequently asked questions
Install the app, turn on two-step verification on the site, add the account by scanning its QR code or entering the setup key, then enter the six-digit code from the app whenever you sign in.
Google does not provide a desktop version, so the safest method is to use the app on your phone while signing in on your PC. Third-party tools can generate the same type of code from the setup key, but they are not Google Authenticator, so choose reputable ones and protect them.
If codes are synced, sign in with the same Google Account on the new phone. Otherwise use Transfer codes, Export codes on the old phone and Import codes on the new one, then test a login before wiping the old phone.
Yes. The code is generated on your device, so it works offline, as long as the phone’s clock is correct.
If your codes were synced, sign in to the app on a new device with your Google Account. If not, you must use each site’s backup codes or recovery process and set up the app again.
It is much safer than a password alone and generally better than text-message codes, but it does not stop real-time phishing. Passkeys and security keys offer stronger protection where available.
Most often the phone time or time zone is wrong. Fix the clock, wait for a fresh code and try again.
Syncing gives you recovery and convenience but ties your codes to your Google Account security. Not syncing keeps codes local but needs more careful backups. Choose based on your risk and habits.